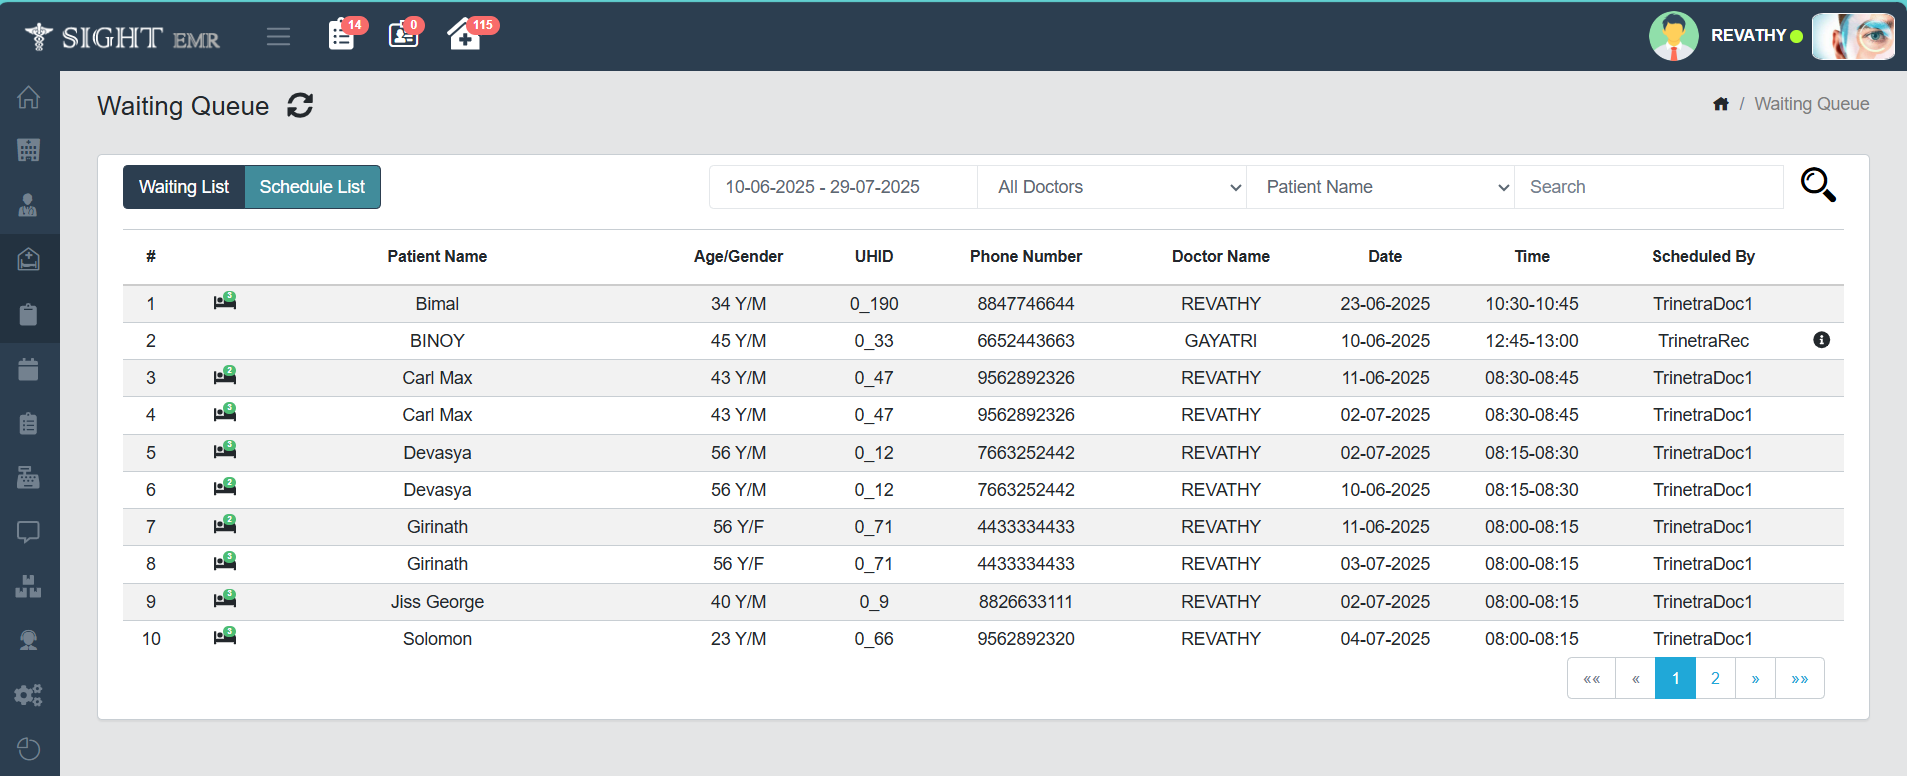
Waiting Queue
- 🖥️Web
- 📱Mobile
The Waiting Queue screen provides a real-time overview of patients who are waiting to be seen by doctors. This includes both scheduled and walk-in patients and supports various actions such as billing, prescribing, and record management.
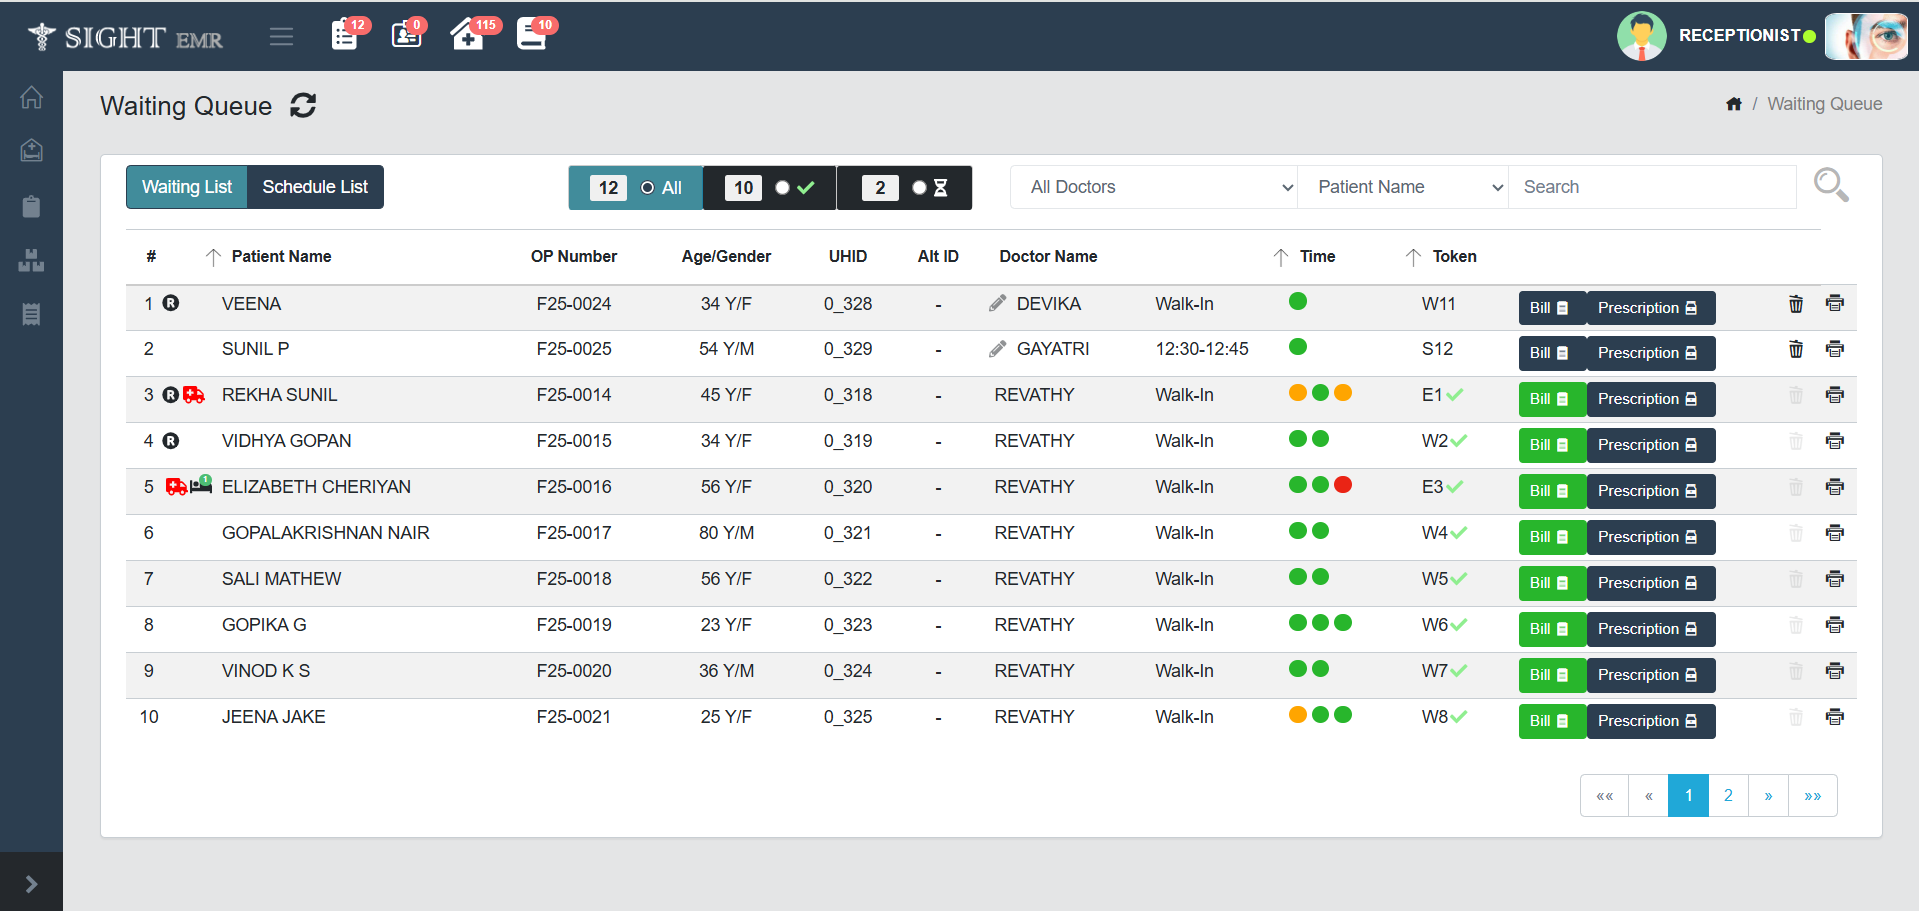
Waiting List (Receptionist)
- Displays the current patients waiting to be seen. The list contains Patient name, OP Number, Age/Gender, UHID,Alt ID, Doctor Name, Time, Token No.
- Doctor name can be edited by the receptionist from the waiting queue if there is no green tick mark denoting that the final save is completed.
- A green ✅check mark in Token Patient has completed their consultation or visit.
- Token number generated based on Emergency/Schedule/Walk-In (E.g.; E1, S2,W3….).
- The scheduled time will be displayed for the Scheduled patients.
- Bill Icon for Generated Bill will be indicated as Green Colour.
- Filters and Controls
- Doctor Filter: Select a specific doctor to filter the queue.
- Patient name/ OP number/ UHID/ Alt ID Filters: Filter patients using patient name, OP number, UHID, Alt ID.
- Status Filters: Total Count, Completed, Pending
- Refresh Button (⟳): Reloads the current queue data.
- Bill Button:
- Opens the billing screen for the selected patient.
- Generate and Print New Bill/Investigation Bill by clicking the buttons New Bill and Investigation Bill.
- Prescription Button: View the Drug Details of the patient added by the Dr. Double click on the List to View Preview.
- Trash Icon 🗑️: Click the trash icon located in the Action column to remove a patient from the list (Before Refraction/Dr Pick). The selected patient will no longer appear in the waiting list.
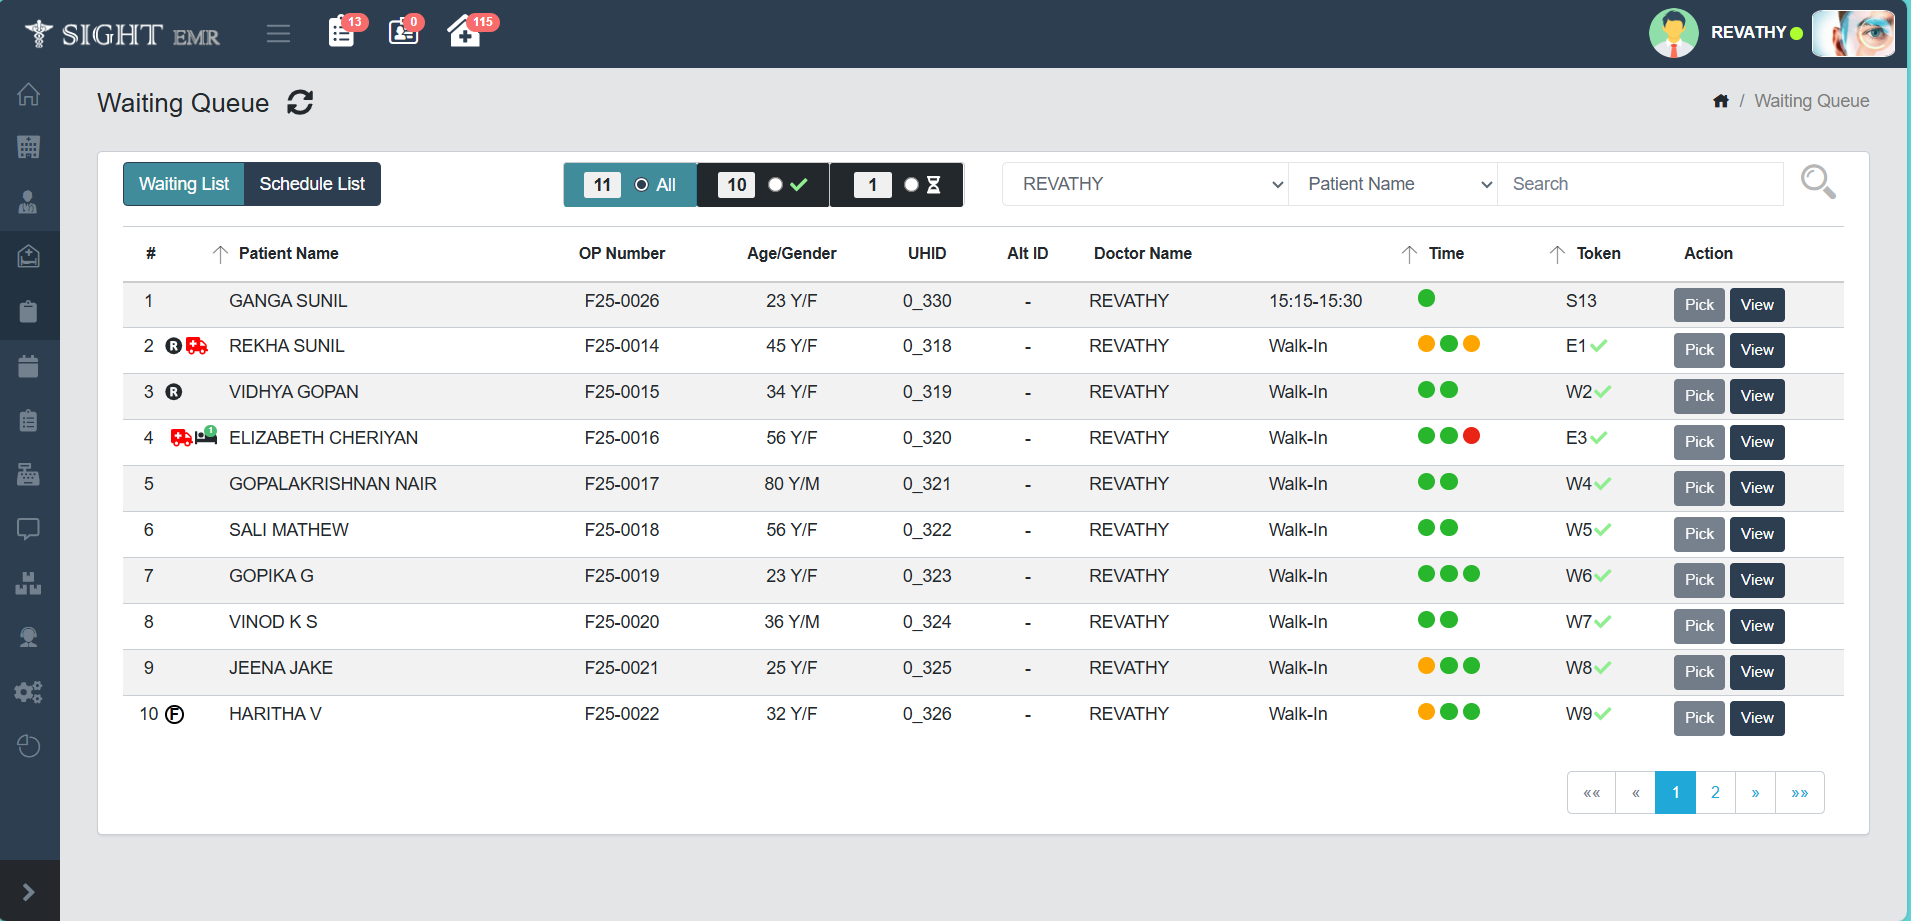
Waiting List (Refractionist)
- Displays the current patients waiting to be seen. The list contains Patient name, OP Number, Age/Gender, UHID,Alt ID, Doctor Name, Time, Token No.
- Action Buttons: Pick: Click Pick button to pick the patient from Waiting Queue and update the Refraction data.

tip
First Dot: Refraction Wait Time Second Dot: Consultation Wait Time Third Dot: Hold Wait Time Colour Codes: Green, Oraange, Red
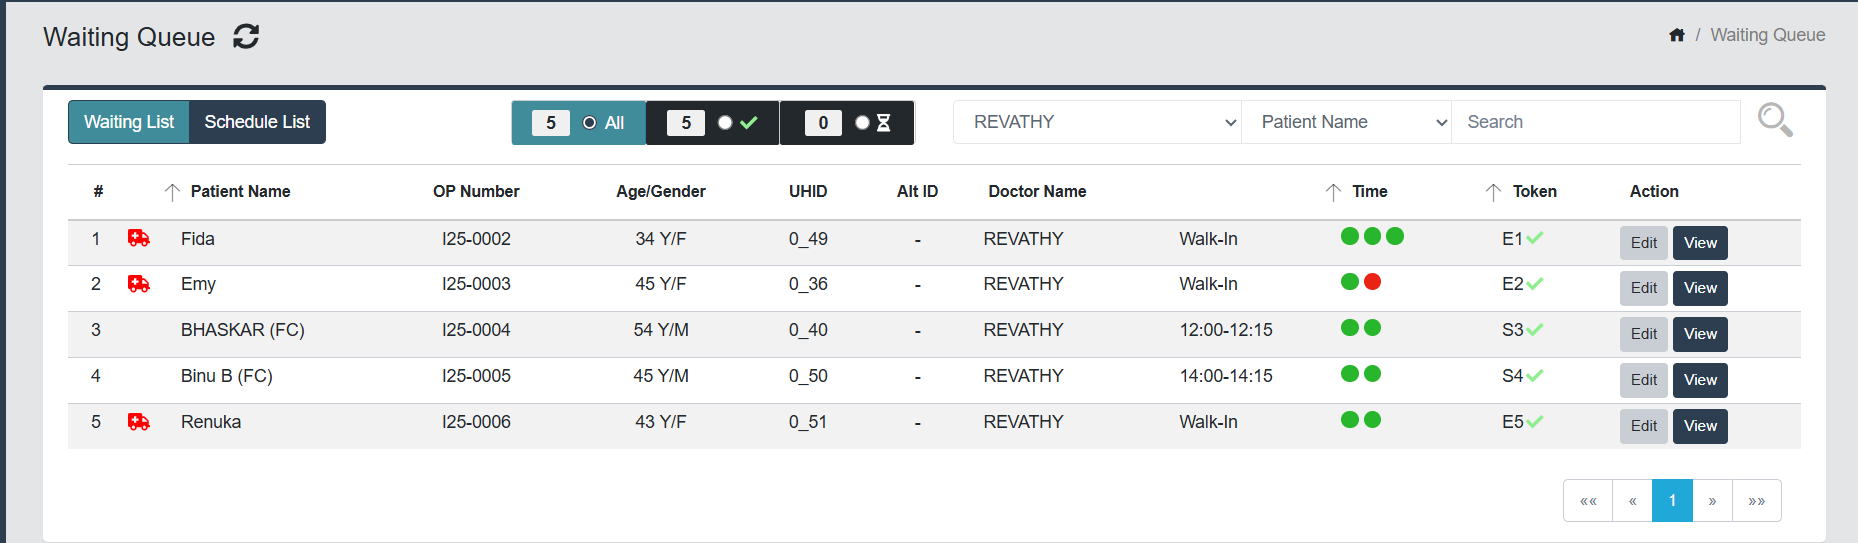
Waiting List (Doctor)
- Displays the current patients waiting to be seen. The list contains Patient name, OP Number, Age/Gender, UHID,Alt ID, Doctor Name, Time, Token No.
- Action Buttons:
- View: View the Patient History without editing or saving the data.
- Pick: Click Pick button to pick the patient from Waiting Queue and save the patient data.
- Edit
- Once a consultation is completed for a patient, their Token will show a Green Tick. This indicates the consultation is closed.
- In the Waiting Queue, even after a consultation is completed and marked with a ✅ Green Tick, the system allows you to edit patient details if required.
- This ensures that corrections or additional updates can still be made without blocking the workflow.
- Despite the consultation being marked complete, the Edit button remains active.
- Click Edit to make corrections to patient details, appointment data, or other editable fields.
note
- Edit action will not affect the touch time and wait time calculations that is already stored during the consultation time.
- The User (Refractionist/Doctor) will get a soft warning message (This patient is picked and in progress by "Refractinoist/Doctor Name", if a patient is picked by another user. Only they can pick the patient if the user closes the screen or after saved the patient details.
Schedule List (Receptionist)
Displays the Scheduled patients (Patient name, Age, Gender, UHID, Phone Number, Doctore name, Date, time and Scheduled by with Schedule Instruction) from the present date (Default date-Current Date).
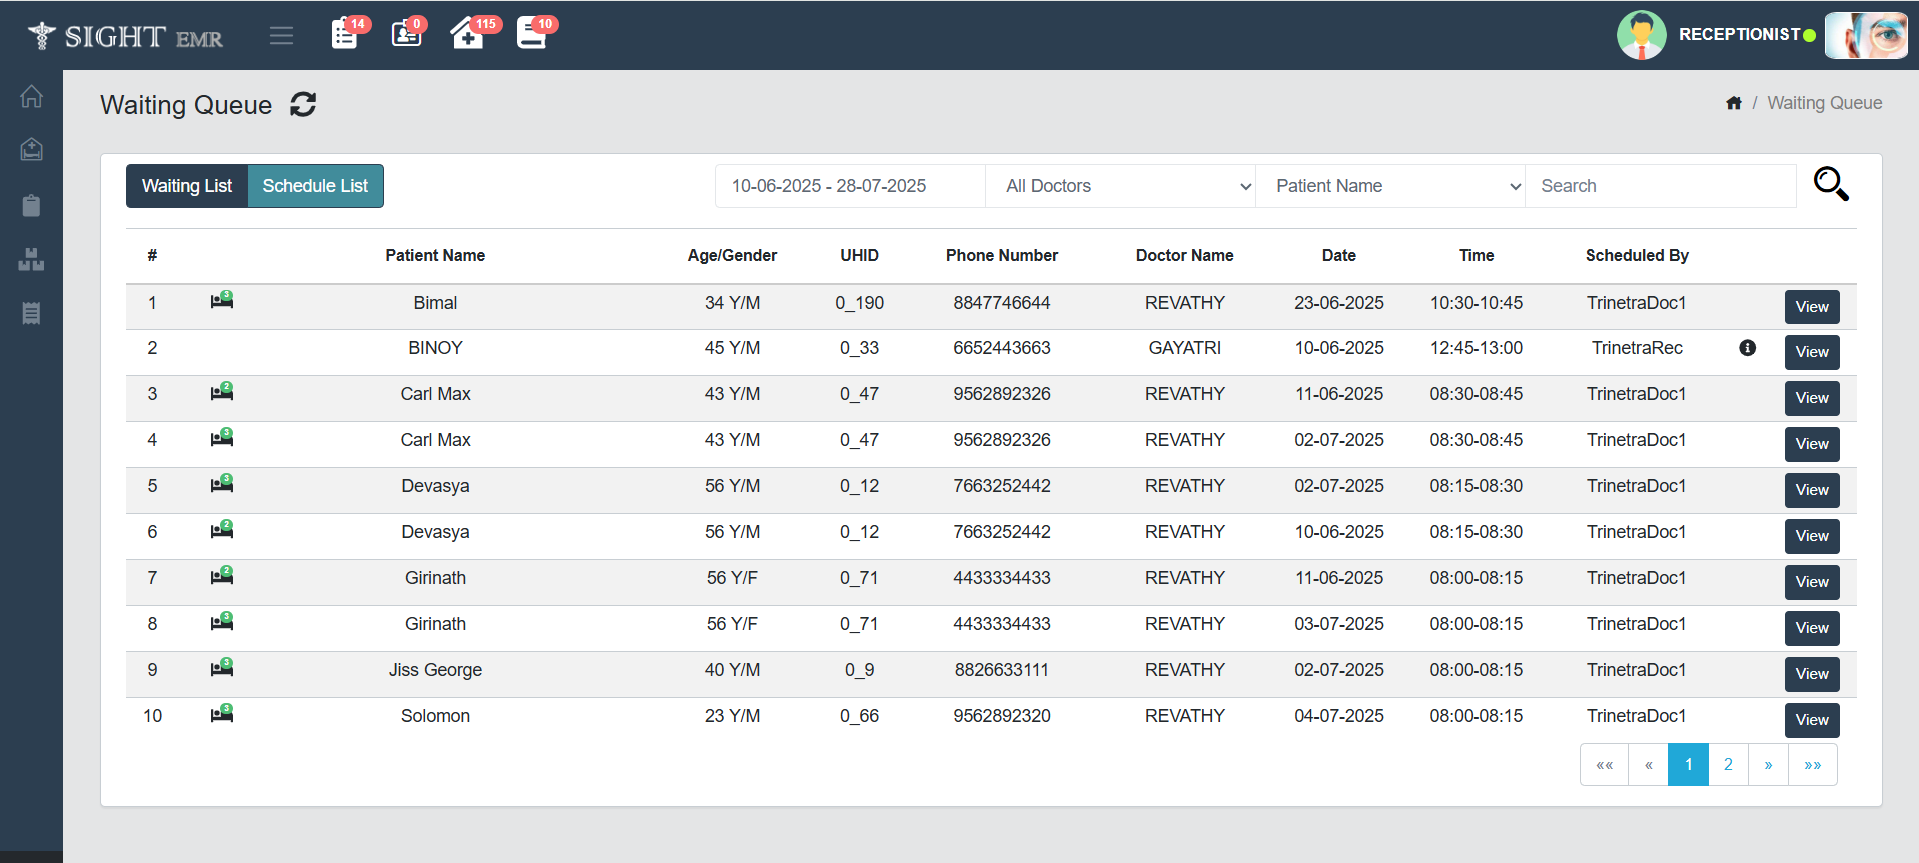
- Filters and Controls
- Date Filter: Filter patients by Date range.
- Doctor Filter: Select a specific doctor to filter the queue.
- Patient name/ OP number/ UHID/ Alt ID Filters: Filter patients using patient name, OP number, UHID, Alt ID.
- View Button: Click View button to view the Scheduled details (Dr.Name/ Patient Name/ Time/ UHID/ Phone Number/ Purpose of Visit/ Schedule Instructions).
- Check Boxes: Tick the check boxes for Foreign Citizen and VIP.
- OP Card Details:
- For Existing Patients, generated OP Card Details at the time of schedule are displayed.
- For New patients you can edit the OP Card Details (OP Number, Generated On, Visited Completed, Expiry Date) and click Submit to save the data.
- Check Boxes: View/Edit the check boxes (Camp Patient/ Follow Up/ Free OP/ Post OP Patient/ Post OP 1/ Post OP 2/ Post OP 3/ Review Paid/ Review Visit/ Vulnerable Patient).
- Action Buttons
- Cancel Schedule: Click Cancel Schedule a scheduled appointment. Fill the reason for the cancellation. The reason for cancellation will be displayed in an 'i' hover.
- Bill: Generate Bill for the Patient.
- Confirm: Click Confirm button to confirm the Scheduled Appointment. The patient will move to the **Waiting Queue-Waiting List.
- Close: Click Close button to close the present page.
Schedule List (Doctor)
- Displays the Scheduled patients (Patient name, Age, Gender, UHID, Phone Number, Doctore name, Date, time and Scheduled by with Schedule Instruction) from the present date (Default date-Current Date).
- Doctor cannot Confirm the patient from Schdeule List.
note
1. The Schedule List will be Grey out if there is no scheduled patients.
2. Schedule List is not available for Refractionist.
Receptionist
Patient Queue - Queue Button
- Go to Patient Queue (Side Nav)
- This screen displays Patient details (Name, Age, Phone Number, UHID, Alt ID, OP No., Token Number, Doctor Name, Time-Walk-In:Refraction/Hold/Consultation Time with colour codes).

- Download: Can download Bill and Prescription if any.
Refractionist
Patient Queue
- Go to Patient Queue.
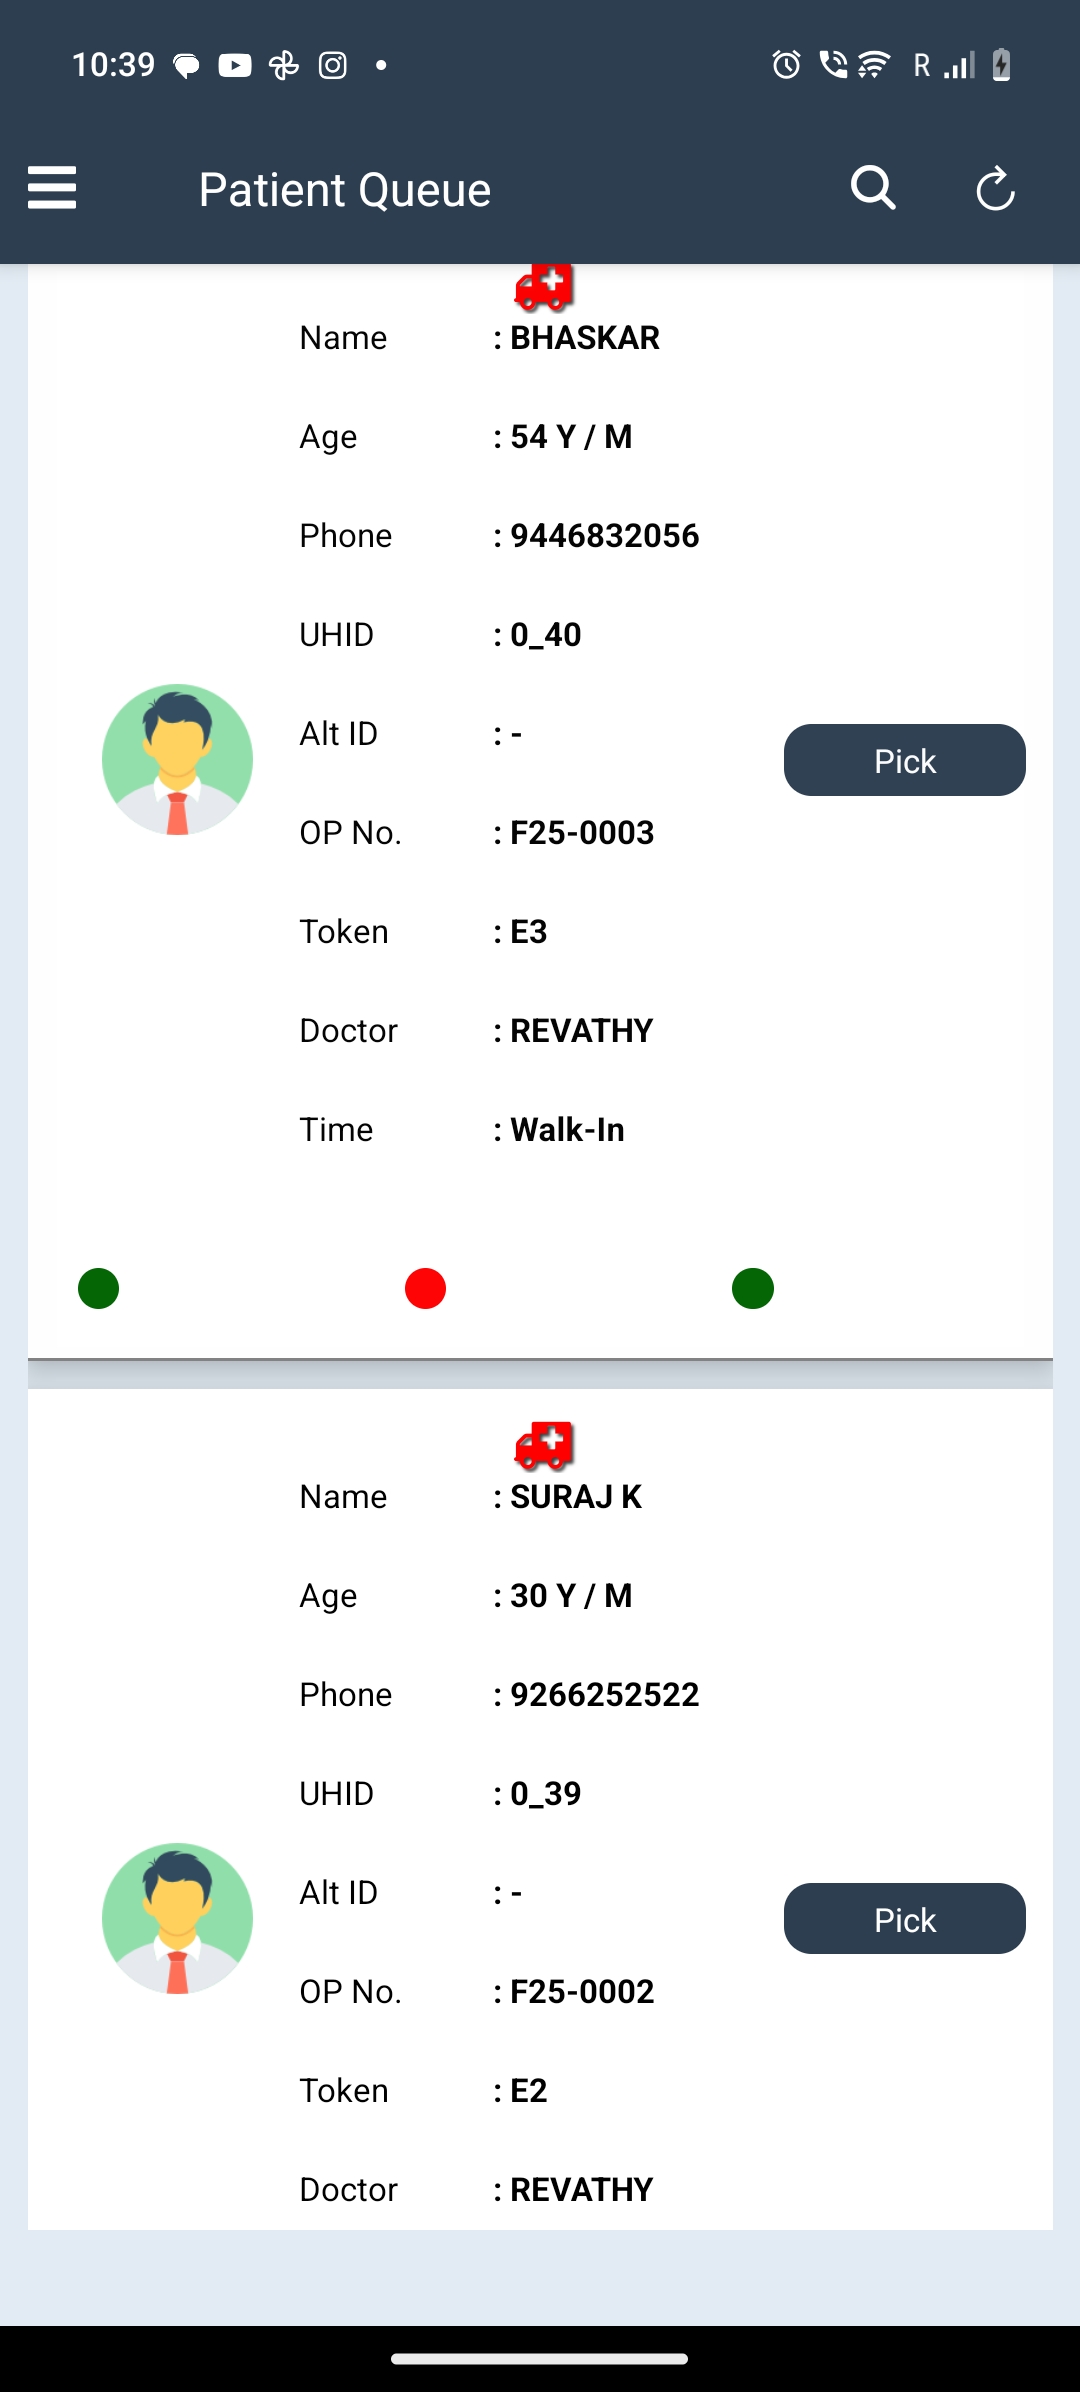
- The screen displays the patient details with Name, Age, Phone number, UHID, Alt ID, OP No., Token Number, Doctor Name and Time-Walk-In:Refraction/Hold/Consultation Time with colour codes.
- If Refractionist pick the patient a green human icon will appear at the left bottom.
- Click Pick button to pick the patient from waiting Queue.
- Edit Patient Details if needed.
- Add Required Clinical Examination Findings with comments for each section such as:
- Biometry
- Retinoscopy (Dry/Wet)
- EOM (RE/LE)
- Basic Squint Eval (With Glass/Without Glass)
- BSV Assessment (OD/OS)
- Refraction (DIL+ and DIL-), PGP, PMTValues for OD/OS
- Select Glass Progression (Radio buttons): No GP/ Continue GP/ New GP.
- Click Refresh button to clear the Refraction data.
- Click Camera icon to add attachments from Files/ take pictures from camera.
- Click Submit button in all sections to save the entered data.
- Click Update button in the patient queue to save all the patient details added by the Refractionist.